Sign in with Facebook
Do you have a new app?
Do you want an easy way for users to sign-up and login?
Social sign-up & login is the answer. Let's make it happen with Facebook.
Intro
We already wrote about sign-in & sign-up with Google, Microsoft here.
The sign-in and sign-up for Apple users is documented here.
In this blog we want to look at another provider of authentication services - Facebook.
Motivation
With over 3 billion of monthly active users, Facebook just might have the largest user database.
It should be a no-brainer, to allow these users to sign-up and sign-in to your app or service with a single click. Never-ever needing a password.
We believe this is a massive benefit for the users. Both in convenience - single click is hard to beat. And in security, no password to create, re-use, forget or steal...
It will also make your app stand out.
The technique is called Sign in with Facebook and by now, you have surely seen it or used it on the web numerous times.
If your web app/service is using NodeJS & Express, you can install the passport-facebook npm package. Still, you might find the account adn app setup sections valuable.
If you need more control over the authentication. Of if your service is multi-tenant or you just want to see how to implement OAuth, read on.
Facebook developer account & app setup
As with any OAuth service provider, we have to connect with facebook and create an app profile. This is needed to get the clientID, clientSecret and to register callback url(s).
To create a developer profile with Facebook click here. We will not need any Javascript SDK for OAuth, so just ignore that. This will start a registration wizard, so provide the info and keep clicking next.
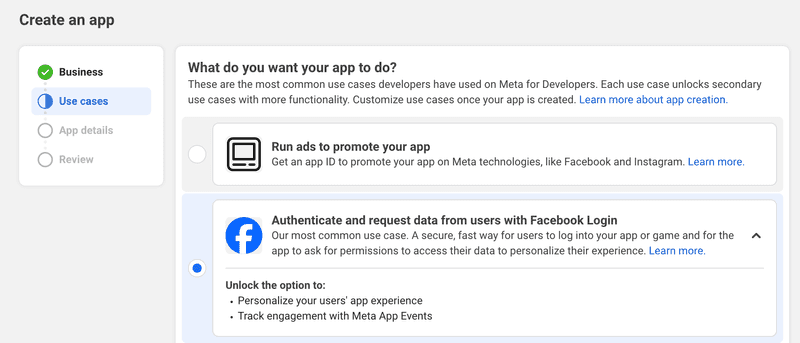
Once you have a dev account you can create your app here.
Keep in mind that you will need a real business id to create an app.
Facebook will verify that you are actually connected to the business, so make sure you double check the info you provide.
Also, the verification might take a few hours.
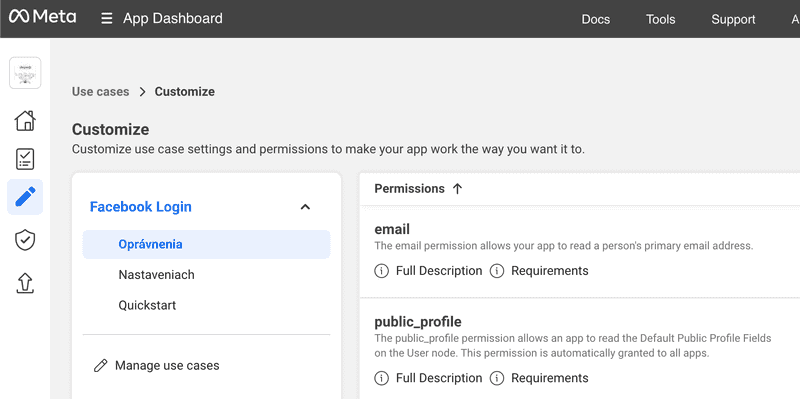
Afte ryou complete the app setup, you should verify your use case setup.
Check that you have the required permissions enabled for your app here:

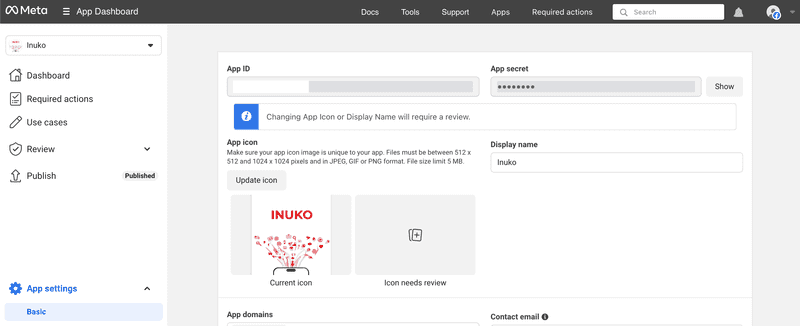
And then go to settings to get your clientID, clientSecret and to provide app icon, name, links and register callback url(s).

Code
Armed with the required parameters we can look at the code.
We will add a button on our React Login page.
<button className="loginWithFacebook" onClick={onLoginWithFacebook}>
	<span>
		<svg aria-hidden="true" className="svg-icon iconFacebook" width="18" height="18" viewBox="0 0 18 18"><path fill="#4167B2" d="M3 1a2 2 0 0 0-2 2v12c0 1.1.9 2 2 2h12a2 2 0 0 0 2-2V3a2 2 0 0 0-2-2zm6.55 16v-6.2H7.46V8.4h2.09V6.61c0-2.07 1.26-3.2 3.1-3.2.88 0 1.64.07 1.87.1v2.16h-1.28c-1 0-1.2.48-1.2 1.18V8.4h2.39l-.31 2.42h-2.08V17z"></path></svg>
		<span>Sign in with Facebook</span>
	</span>
</button>
With the click handler just redirecting to our facebook login page url.
The organization variable is the name of the tenant, this would be the 3rd level domain name: organization.yourapp.com.
	const onLoginWithFacebook = (e:any) => {
		doFederatedLogin(e, "facebook");
	}

	const doFederatedLogin = (e: any, authProvider: string) => {
		if (e)
			e.preventDefault();

		let redirect = "/";
		let origin = window.location.origin;
		const originParam = "&origin=" + encodeURIComponent(origin);
		if (window.location.hostname === "localhost") {
			redirect = origin + redirect;
			origin = "http://localhost:3001"; // dev-proxy will try to handle localhost:3000 and just do nop.
		}
		const authUrl = origin + "/auth/" + authProvider + "/" + organization + "?redirectUrl=" + encodeURIComponent(redirect) + originParam;

		// redirect to auth page
		window.location.assign(authUrl);
	}
Now let's look at the server side code. The OAuth flow is actually very straightforward, looks&works like the rest of them.
However do note how we construct the customState variable and pass it via the state OAuth param.
- Passing of the origin (the domain part of the url:
organization.inuko.net). - Adding a random nonce.
Facebook will pass the state variable back to us, in the auth callback.
const executeFacebookAuth = (req:Request, res: Response, signup?: boolean) => {
	const nonce = crypto.randomBytes(19).toString("hex");
	const currentUrlStr = (req.header("x-forwarded-proto") || req.protocol) + "://" + (req.header("x-forwarded-host") || req.headers.host) || "";
	const customState = nonce + (req.query["origin"] || currentUrlStr);
	const session: any  = req.session
	session["fb_nonce"] = nonce;
	session["orgName"] = (req.params as any).orgname;
	session["redirectUrl"] = req.query["redirectUrl"];
	if (signup) {
		session["signup"] = 1;
	}
	const redirectUri = process.env.NODE_ENV === "dev" ? "http://localhost:3001/auth/facebook/callback" : FB_AUTH_URI;
	const url = `https://www.facebook.com/v20.0/dialog/oauth?client_id=${FB_APP_ID}&redirect_uri=${redirectUri}&state=${customState}&scope=email`;
	res.redirect(url);
}

// Redirect the user to the Facebook signin page and create user.
app.get("/auth/facebook/signup/:orgname", (req, res, next) => {
	executeFacebookAuth(req, res, true);
});
// Redirect the user to the Facebook signin page
app.get("/auth/facebook/:orgname", (req, res, next) => {
	executeFacebookAuth(req, res);
});
Once the user logins to hers/his Facebook account and confirms to allow Facebook login, our callback server url will be called by Facebook. Let's look at what we have to do.
- First we have to redirect from the generic single OAuth redirect uri to the correct organization uri. This will also load the right session. We use the OAuth state param to keep the infomation. This is what the
oauthCommonHandleSubDomainRedirectmethod does.
We also check the nonce validity, note we have to do that after the redirect, otherwise the session will be empty. 2. The we use the passed code to get the access-token. 3. We use the access-token to get the user email. 4. We use the session info and do a login or sign-up.
app.get("/auth/facebook/callback", (req, res, next) => {
	const customState = req.query.state as string || "";
	const redirect = customState.substring(38);
	const nonce = customState.substring(0, 38);
	oauthCommonHandleSubDomainRedirect(redirect, req, res, () => {
		if ((req.session as any)['fb_nonce'] !== nonce) {
			res.status(500).send("error");
			return;
		}
		next();
	});
}, async (req, res, next) => {

	const code = req.query.code;
	try {
		const redirectUri = process.env.NODE_ENV === "dev" ? "http://localhost:3001/auth/facebook/callback" : FB_AUTH_URI;
		const url = `https://graph.facebook.com/v20.0/oauth/access_token?client_id=${FB_APP_ID}&client_secret=${FB_APP_SECRET}&redirect_uri=${redirectUri}&code=${code}`;

		const resp = await fetch(url);
		if (resp.ok) {
			const tokenResp = await resp.json();
			const meResp = await fetch("https://graph.facebook.com/me?fields=name,email&access_token=" + tokenResp.access_token);
			const profile = await meResp.json();

			if (!profile.email) {
				throw Error("FB login error: no email");
			}

			await loginOrSignupWithOauthRaw(req, res, next, profile.name, profile.email);
		} else {
			throw Error("FB login error");
		}
	}
	catch (e) {
		next(e);
		console.log(e);
	}
});

const oauthCommonHandleSubDomainRedirect = (customState: string, req: Request, res: Response, next: ()=>void) => {
	if (customState) {
		const u = new URL(customState);
		const currentUrlStr = (req.header("x-forwarded-proto") || req.protocol) + "://" + (req.header("x-forwarded-host") || req.headers.host) || "";
		const currentUrl = new URL(currentUrlStr);
		if (currentUrl.origin !== u.origin) {
			let path = req.originalUrl;
			if (path[0] !== '/')
				path = "/" + path;
			res.redirect(307, customState + path);
			return;
		}
	}
	next();
}
Depending on your storage, loading and creating the users will look very differently. Thus the getUser and createUser methods are left unimplemented.
The actual login as far as NodeJS and Express are concerned, is the req.login() call. We could simplify the code and remove the doLoginAndNext method and just call login() directly. But this methods it gives us a single central place where we can log, collect statistics, set persistent login cookie, add custom headers, and so forth. And in our production code, we also call it for the email&password login case.
The reason we have two methods loginOrSignupWithOauth and loginOrSignupWithOauthRaw is because you can drop in the loginOrSignupWithOauth method to most PassportJS authentication callbacks.
const loginOrSignupWithOauth = async (req: Request, profileName: string, profileEmail: string,
	done: (err: any, user: IUser | boolean) => void) => {

	try {
			const orgName = sanitizeOrgName((req.session as any)["orgName"]);
			const user = await getUser(orgName, profileEmail);
			if (user) {
				return done(null, user);
			}

			if (!(req.session as any)["signup"]) {
				return done(new Error("User not found!"), false);
			}

			const displayName = profileName || profileEmail.split("@")[0];
			const randPwd = crypto.randomBytes(20).toString("base64");

			const user = await createUser(orgName, displayName, profileEmail, randPwd, req);
			return done(null, user);
		} catch (error) {
			return done(error, false)
		}
}
const loginOrSignupWithOauthRaw = async (req: Request, res: Response, next: NextFunction, profileName: string, profileEmail: string) => {
	await loginOrSignupWithOauth(req, profileName, profileEmail, (err, user) => {
		if (err) {
			next(err);
		} else {
			doLoginAndNext(user as IUser, req, res, err => {
				if (err) {
					next(err)
				} else {
					const redirect = (req.session as any)["redirectUrl"] || "/";
					res.redirect(redirect);
				}
			});
		}
	})
}
const doLoginAndNext = (user: IUser, req: Request, res: Response, next: (err?: any) => void) => {
	req.login(user, (err) => {
		if (err) {
			return next(err);
		}
		setPersistentLoginCookie(res, user);
		next();
	});
}
Wrap
Whether we are a Facebook users and whether or not we like Meta and Facebook, we cannot overlook 3 Billion users.
Giving these users a single-click login and sign-up experience is just too good-a-feature to skip.
Beyond the convenience, this feature also protects our service.
Since the user cannot choose a trivial, easy to guess password, the user-account is unlikely to get hacked.
Furthermore, with Facebook multifactor authentication, we get MFA for our app/service for free.
Happy hacking!


