Sign in with Apple
A frictionless sign-up and sign-in experience has many benefits.
Once a user is ready to try our app, don't lose them in the sign up procedure.
Once a user starts using our app, don't lose them becuase they forgot their login.
Multifactor and not reusing passwords keeps user's data safe.

Intro
We already wrote about sign-in & sign-up with Google and Microsoft here.
In this blog we want to look at another provider of authentication services - Apple.
Motivation
There are 1.5 billion active iPhone users.
All of them will be able to sign-in and sign-up with TouchID or FaceID, never-ever needing a password.
We believe this is a massive benefit for the users. It will also make your app stand out.
The technology is called Sign in with Apple and by now you have surely seen it on the web.
While researching this topic, we haven't found a good blog or npm package. There is some info scattered around the web.
And there is even a PassportJS package that is close, but is missing critical features (like getting the user's email).
Then, there is the absence of any testing environment by Apple, which makes it really hard to develop.
Long story short, it took us hours to piece the whole picture together. And several more hours of deploying test versions until it all worked.
Apple account setup
Before we delve into the code, we have to provide information to Apple.
You will also have to sign-up for a developer account with Apple.
Keep in mind that this is a paid service.
App ID
First we will create an new App ID (or use an existing app if you have one).
- Go to your developer account
- Under Certificates, IDs & Profiles click on Identifiers here.
- Click the big blue PLUS and create a new AppID, select type App.
- Note down the App ID Prefix (TeamID) in the top right corner, we will need it later.
- Scroll down in the long list of capabilities and choose Sign in with Apple
- In the edit dialog select Enable as a primary App ID
- Choose a name and identifier for your app and finish the setup (click continue).
Services ID
Now that we have the App ID, we can create the Services ID.
- Go back to the list of identifiers and click the big blue PLUS.
- Select Services ID and click continue.
- Choose a name and identifier. Write down the identifier this is the client_id and we will need it later.
- Mark Sign in with Apple in the list of options below the description.
- In the Configure dialog choose the Primary App ID (the one we created above).
- In the domains field, write your domain fe: inuko.net
- In the Return URLs field, write your callback url, fe: https://yourdomain/auth/apple/callback. Sadly we can't use localhost for testing.
- Finish the setup (click continue).
Keys
To recap, by now you should have an App ID and a Services ID ready and configured.
Now we have to make a key to secure the communication between our app and Apple.
- In Certificates, Identifiers & Profiles in the left hand menu, choose Keys
- Click the big blue PLUS.
- Choose a key name
- Mark Sign in with Apple in the list of options below the key name.
- In the Configure dialog choose the Primary App ID (the one we created above).
- Finish the setup (click continue).
- Download the key. Make sure you keep it safe.
- Open the key again and write down the Key ID, we'll need it later.
Recap
You should now have an App ID, Services ID and a Key.
Check if you have written down the required ids (team_id in the app, client_id, and key_id).
Make sure you have the key downloaded and safe.
Implementation
Sign in with Apple follows the OpenID or OAuth flows. If you've built or seen an implementation, it will look familiar.
However Apple decided to significantly up the game, so there is also a lot of new and unique things to implement.
The implementation below is for NodeJS backend service.
OAuth recap
The protocol is conceptually straightforward. In case you need a refresher, here are all the steps in detail:
- The users clicks on the "Sign in with ABC" button in our web app.
- This will call our backend service.
- The backend service will build a URL to the providers sign-in page (with the required identifiers) and redirects the browser.
- Now the user is on the ABC provider login page (ABC can be Google, Microsoft, Apple, Facebook, etc.)
- The user signs-in (potentially with MFA or FaceID etc.).
- If the login is correct the ABC provider redirect back to our callback URL (that's why we have to set it up in the Services ID section).
- We are back in our backend service. The ABC provider redirected us back and passed us the CODE
- Now that we have the CODE we can ask the ABC provider about user details.
Let's see how this work for Apple:
Button
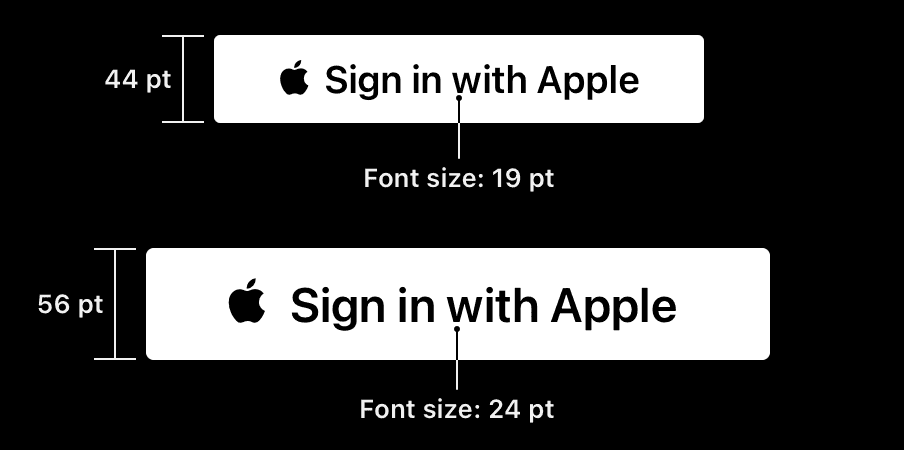
Please follow the guidelines for the Sign in with Apple button design.
It is always a good idea to provide familiar UI, even more when dealing with security.
For our implementation the button is a link to /auth/apple
Prepare and redirect to Apple
The NodeJS handler will prepare the authentication URL and redirect to apple.
Please note:
- We are sending the response_type "code id_token".
- We are sending the scope email, so that we can get the user's email later from Apple
- We are sending the response_mode as form_post. Without this, Apple will respond with an error (because we want the email).
- Whatever you pass in state you'll get back from Apple. Use it to store extra info or as a nonce (you need to keep it also in session then).
app.get("/auth/apple", (req, res) => {
	const scope = 'email'; // we want to know the user's email
	const state = crypto.randomBytes(19).toString("hex");;
	const redirectUri = "https://inuko.net/auth/apple/callback";
	const client_id = APPLE_CLIENT_ID; // something like com.ourdomain.app

	const authorizationUri = `https://appleid.apple.com/auth/authorize?response_type=code id_token&client_id=${client_id}&redirect_uri=${redirectUri}&state=${state}&scope=${scope}&response_mode=form_post`;

	res.redirect(authorizationUri);
});
Handle return
For the following code to work we need to add 2 npm packages.
- node-rsa
- jsonwebtoken
Install both with npm install node-rsa jsonwebtoken.
Once Apple redirects back to our backend service we get 3 pieces of info.
The CODE, the id_token (identifying who is calling our web api) and state, which is just echoed back.
app.post('/auth/apple/callback', async (req, res, next) => {
	const { code, id_token, state } = req.body;
	//...
}
Verify caller
The first step is verifing that we are actually called by Apple.
Now this is not stricly required and the rest of the code will work without this step.
But, it is good practice. Please check the comments in the code for what's going on.
const verify_apple_id_token = async (id_token: string) => {

	// 1. Decode the id_token into parts. We need the header, so we pass the options complete: true.
	const parts = jwt.decode(id_token, { complete: true });

	// 2. Fetch apple public keys. There will be several. Cache if needed.
	const keyResp = await fetch(`https://appleid.apple.com/auth/keys`);
	const keyCollection = await keyResp.json();

	// 3. Find the right key in the key collection, that matches the token's key id (kid) and the algorithm used (alg).
	const publicKey64 = keyCollection.keys.find((x: any) => x.kid === parts.header.kid && x.alg === parts.header.alg);

	// 4. Transform the key information into a usable format.
	const NodeRSA = require("node-rsa")
	const pubKey = new NodeRSA();
	pubKey.importKey({ n: Buffer.from(publicKey64.n, 'base64'), e: Buffer.from(publicKey64.e, 'base64') }, 'components-public');
	const pk = pubKey.exportKey(['public']);

	// 5. Verify the token was made by Apple. This will THROW an exception, if validation fails!
	jwt.verify(id_token, pk, { algorithms: [parts.header.alg] });
}
Create client_secret
When we are sure, that it is trully Apple calling our backend service, we can fetch the user's details.
Hold your horses, not so fast, first we need the secret. The client_secret to be more precise.
Don't worry, we have all the ingredients, we just have to mix them in the right way.
Please check your notes to get them:
- APPLE_TEAM_ID - your apple developer team id (you can get it from the App ID page or from your apple developer profile).
- APPLE_CLIENT_ID - your App ID identifier (something like com.domain.app).
- APPLE_PRIVATE_KEY - the text from the Key file you have downloaded in the Key section.
- APPLE_KEY_ID - the key ID (you can get it when you click on the key in the apple developer identifiers page.)
const make_appleid_client_secret = () => {
	const payload = {
		iss: APPLE_TEAM_ID,
		iat: new Date().valueOf() / 1000,
		exp: new Date(new Date().valueOf() + 86400 * 1000 * 100).valueOf() / 1000,
		aud: "https://appleid.apple.com",
		sub: APPLE_CLIENT_ID
	};
	const private_key = APPLE_PRIVATE_KEY;
	const clientSecret = jwt.sign(payload, key, { algorithm: 'ES256', header: { "kid": APPLE_KEY_ID } });
	return clientSecret;
}
The secret we created above is valid for 100 days (for any user). The maximum allowed by Apple is 180 days.
If you decide you want to cache it, make sure you keep it safe!
Get the user's email
Finally we can call Apple and get the user's email, so that we can check they are indeed our user and log them in.
const fetch_appleid_user_info = async (code, clientSecret, state) =>{
	const d = new URLSearchParams();
	d.append('grant_type', 'authorization_code');
	d.append('code', code);
	d.append('client_id', APPLE_CLIENT_ID);
	d.append('client_secret', clientSecret);
	d.append('redirect_uri', "https://inuko.net/auth/apple/callback");
	d.append('scope', "email");
	d.append('state', state);

	const resp = await fetch("https://appleid.apple.com/auth/token", { method: "POST", body: d });
	const jresp = await resp.json();
	if (!jresp.id_token) {
		throw Error("Apple Login Error - no token - 0x2");
	}

	const token = jwt.decode(jresp.id_token);
	//const appleUserId = token.sub; // UNIQUE User identifier.
	const appleUserEmail = token.email;
	if (!appleUserEmail) {
		throw Error("Apple Login Error - no email - 0x3");
	}
	return appleUserEmail;
}
Putting it all together
Let's put all the pieces together now.
const jwt = require("jsonwebtoken");

app.post('/auth/apple/callback', async (req, res, next) => {
	try {
		const { code, id_token, state } = req.body;

		await verify_apple_id_token(id_token);

		const clientSecret = make_appleid_client_secret();

		const userEmail = await fetch_appleid_user_info(code, clientSecret, state);

		const user = await get_user_from_database_by_email(userEmail); // Replace with your actual code...
		if (!user)
			throw Error("User not found!");

		req.login(user, err => {
			if (err) {
				next(err);
			} else {
				// SUCCESS - go to app
				res.redirect("/");
			}
		})
	}
	catch (err) {
		next(err);
	}
});
That was fun...
Putting this together felt a lot like building a large Lego set without any instructions.
You know, like figuring our which parts have similar colors and fit together.
I hope you find the explanation and the code above helpful.
Whether you enjoy this kind of work or you just like to have this feature in your app:)
Happy hacking!
Continue reading
Sepa mass payment ISO20022


QR codes are a great way to quickly create a single bank payment. But what if you need to create multiple payments and regularly? There is a file format standard for that! Let’s look at how to build Sepa mass payment.
Making Addresses Work


There are many reasons to visit a client. Whether it is for therapy, for sales or for delivery, the journey cannot start without an address.
SQL OR condition on joins


Queries with OR conditions are notorious for being hard to make fast.
Avoid them if you can, read on if you cannot.